My Go To Fall Look With Sleek Vintage Romance Palette (Tutorial)
Hi, everyone! As you can tell from the title, I have a tutorial for my go to make up look, that I do it with Sleek Vintage Romance palette. I actually promised you few tutorials with it and I also got a request for tutorials, so I decided to do first one today. I was thinking about filming it, but I wasn't sure, if it would look ok because of the light and also, because I can film only 8 minutes with my camera and this make up took me longer to do it. Very similar look I already posted here, I just used different eyeshadows.
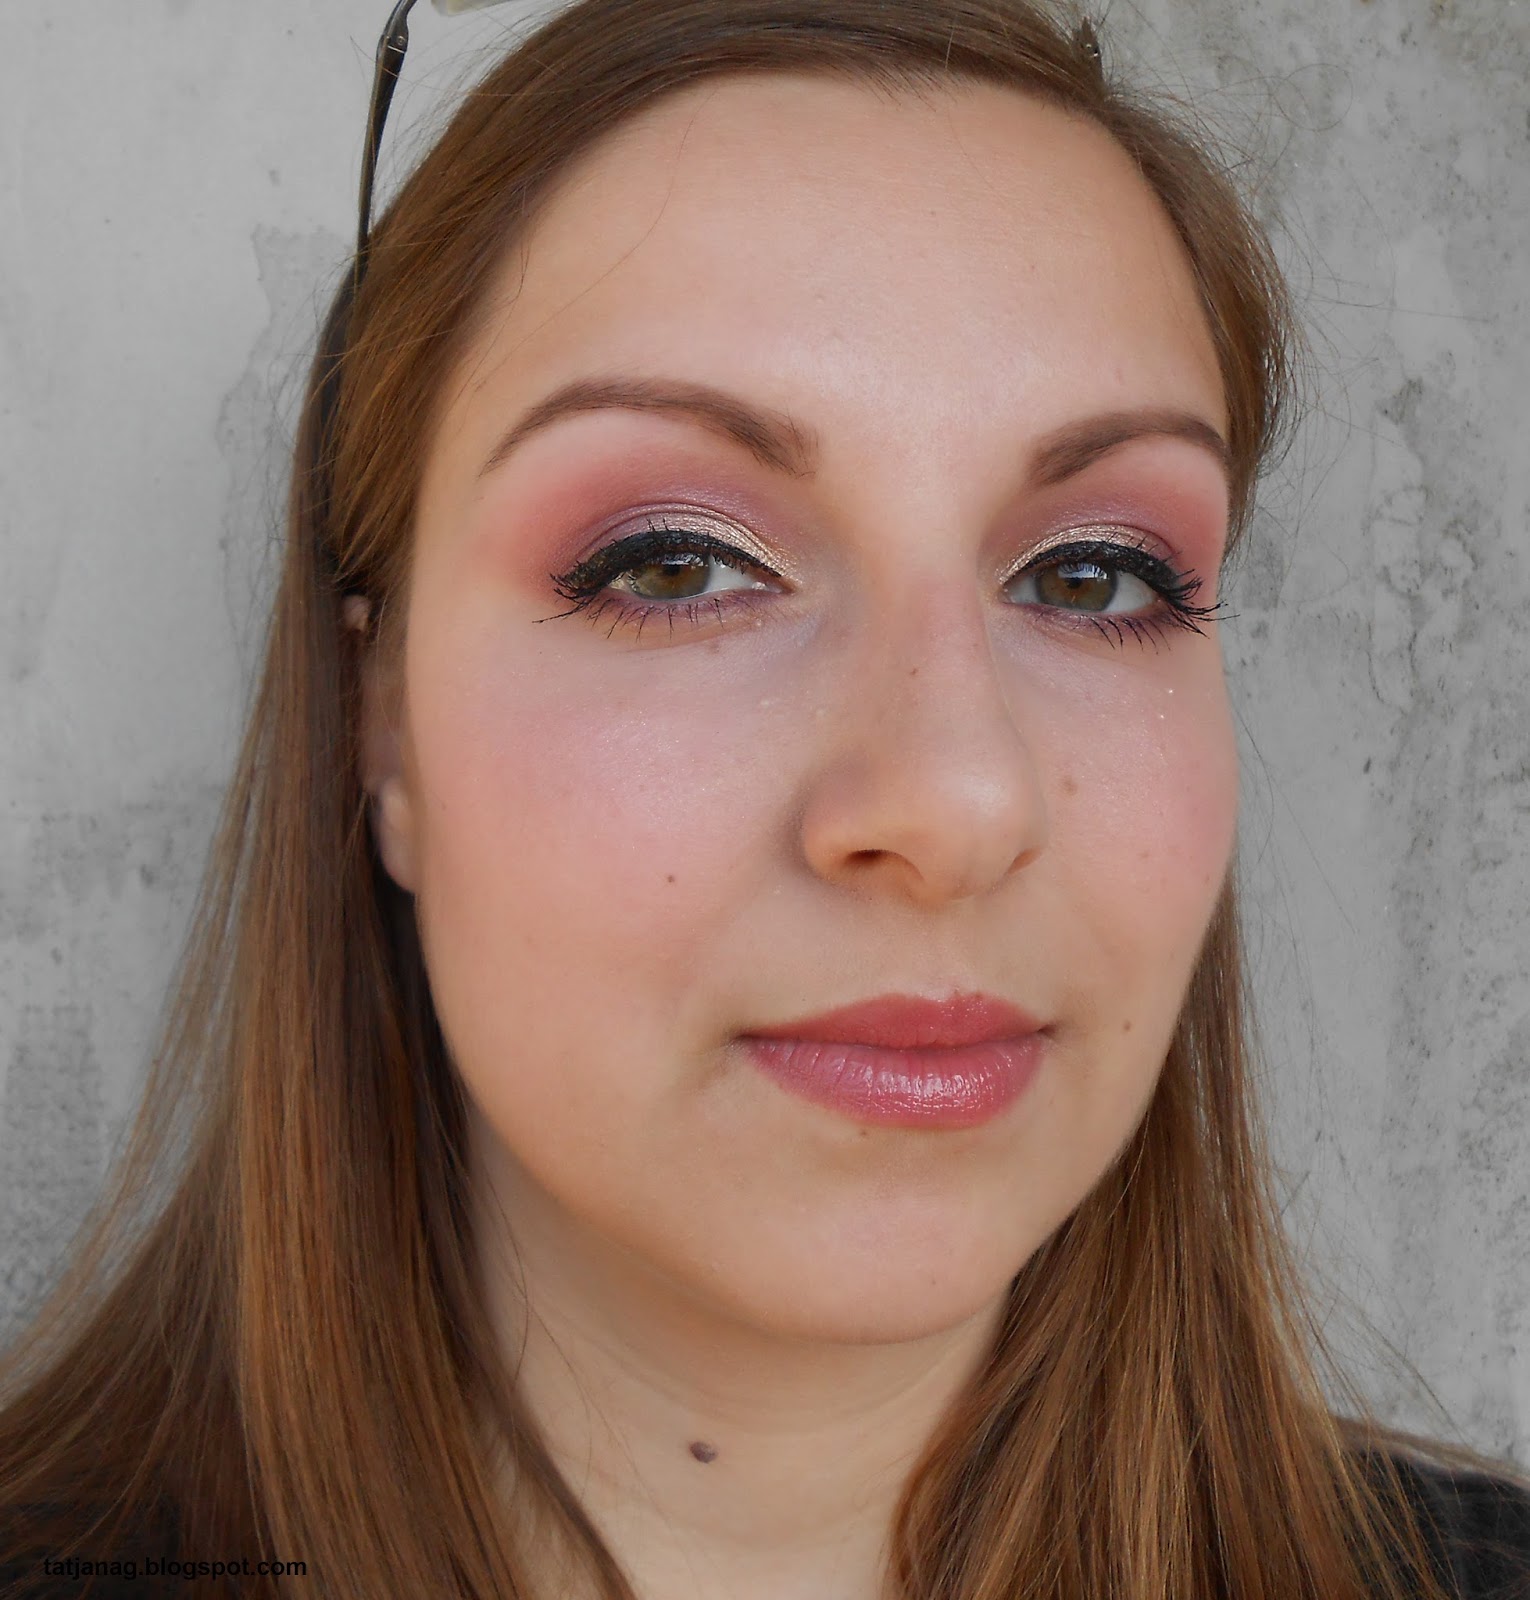
I don't have a lot photos of my full face, only 2, because when I finished photographing an eye tutorial, my mum called me for lunch and I did quickly my face (blush, highlighter, lips) and then took few photos. That's also the reason I used Catrice lip balm, because first I planned to use lipstick. Although I titled this post "my go to make up look", I don't use always the same eyeshadows, I named it that way, because I always use the same technique as I will show you in the tutorial, but I like to change eyeshadows I use for crease or outer V.
Now let's go to the tutorial. It won't be a tipical tutorial, because I'll describe, how I do this look and which eyeshadows I combine (because I don't always use same eyeshadows).
Step 1: Use an eyeshadow base. I'm using Essence I Love Stage base, because it works for me. Eyeshadow base will prevent creasing and it'll make your make up to last longer.
Step 2: On one third of my lid I always apply Meet in Madrid, a golden shimmery shade. I could use Pretty in Paris too, which is a silver shade, but I prefer golden eyeshadow, because I think it's more suitable for fall than silver one.
Step 3: On two thirds of my lid I applied Courtness in Cannes (sometimes I use Lust in LA instead).
Step 4: In crease I applied Honeymoon in Hollywood, a dark burgundy shade, with Ecotools angled crease brush and then I used UBU blending brush to blend it. After you blend this eyeshadow, it becomes very light and soft. In crease I sometimes also use A Wow in Venice or Marry in Monte Carlo, because they are all "pink" toned and they all work the same with this look.
Step 5 and 6: In outer V and on outer part of lid I applied Forever in Florence, a dark plum shade, with Ecotools shading brush and then I blended it with Essence smoky brush. Here I like to use darker shades from the palette (Bliss in Barcelona, Romance in Rome, Love in London) or sometimes I combine more than one shade.

Step 7: On lower lash line I usually use the same color as in outer V. Here I used Forever in Florence. I applied it with Ecotools smudge brush.
Step 8: Next step is to use eyeliner. I don't imagine to wear makeup without eyeliner, but you can skip this step, if you don't like to wear it. I used Catrice Don't Move eyeliner.
Step 9 and 10: Next step is to use mascara. Here I used Essence I Love Extreme mascara. After I used a mascara, I highlighted my browbone. I don't know, why, but that's always the last step in my eye make up. I always use highlighter, after I'm done with everything else (including eyeliner and mascara). Here I used Alverde Vanille, because none of the eyeshadows in palette is good for highlighting, at least not to me.

Products I used for this look:
*Eyes:
- Sleek Vintage Romance palette
- Essence I Love Stage eyeshadow base
- Alverde Vanille
- Catrice Ink Waterproof Eyeliner Don't Move
- Catrice eyebrow set (for brows)
*Face
- Bourjois Healthy Mix 02 Vanilla
- Essence Stay All Day Longlasting Concealer 02 Soft Beige
- Essence All About Matt fixing compact powder
- Essence Metal Glam Gold Digger highlighting powder
- Maybelline Colorama 501 blush
*Lips
- Catrice Pure Shine Colour lip balm My Cherry Berry

So, this was my first make up tutorial. If you want them more and you have any ideas, what kind of looks would you like to see, just let me know (tomorrow I'll try to make another one with this palette, if there were be enough time in the morning and I will post it next week). I hope you like this post and tutorial, but I would like to hear your opinion about it (what do you like, if I need to change anything ...). Thank you for reading!
)
Posting Komentar untuk "My Go To Fall Look With Sleek Vintage Romance Palette (Tutorial)"
Posting Komentar